Posts

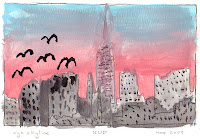
First stop in North America? N.Y.C. of course...
Image
Master N. Davis. Feel like your looking at a movie-still and things are about to get a little scary? Well, stay tuned (by that I mean look at the next version, below - you were right...) Master D. Harwell. A mysterious sort of scene. (Or is it just me?) Miss N. Buckingham Is it just me (again) or does this have a 'futuristic look' to it? I know, paying attention to too many movies like "Aeon Flux"... Master J. Wolters Great colors. Notice the detailing on the Empire State's upper tower. Master B. Davis Great 'depth-of-field' by not only using various 'shades' for the layers of buildings, but changing up the colors, too. Works perfectly to capture this 'superhero moment.' Miss A. Escue Dreamy. Miss R. Fadler Exceptionally beautiful color-transitions in this sky. Miss M. Wolfe D R A M A T I C. You know those evenings when the sun seems to set the entire sky on fire and then it just GOES BLACK... Miss K. Breeding She missed star...
Good News/Bad News: Australian Landscapes

Image
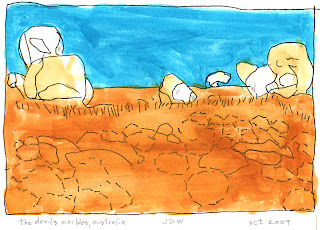
Tuesday AM Update : a commenter notes that there are some paintings "among the missing" (and I now count only 8 on display out of 12 total - what was I thinking?) and she's right. My bad. Must go back to my other computer in a little bit in order to post them. Sorry. Master J. Wolters Miss M. Wolfe Miss C. Lee Miss R. Fadler ...................................................................................................................... Here's the good news: all my students did a great job on the assignment. The "bad news"? They did it without me...Boo-hoo-hoo. There, now that I got that out of my system have a look at their paintings. Master N. Davis Miss N. Buckingham Miss K. Breeding Miss H. Ridge Master D. Harwell (unfinished: missed class first week on project) D.H.'s picture (as it might appear when finished - Photoshopped by Mrs. L.) Master B. Davis Miss A. Escue Miss A. Cole

Step-by-Step Australian Landscape Demo

Image
Ink your pencil tracing - except for the white areas you marked with a "W" first! Give the SKY a middle blue & let it dry, then go over everything else (except the whites) with a golden-tan. Let it dry. Mix up a batch of red-brown and paint your rocks and the ground around the grass-clumps. Start to green-up your trees with a middle tone. Complete your middle-greens in the trees & grass-clumps saving some of that sunny-tone for ready-made highlights. Give the grass-clumps and trees some dimension by adding deeper greens, using directional 'leaf-shaped' strokes for the grass. Make rich shadow-colors by adding compliments (opposites on the color wheel - and in your paintbox, instead of plain old black) Finishing steps: deepen sky tones, deepen rock/dirt tones, add shadows coming from grass-clumps and on 'left sides' of rock formations. Put some 'texture' on the ground and rocks using the smallest amount of rock-shadow tone and a small brush. Boos...